
Project
Date Created
Author
U
UntitledTools & Skills
sewingbernette
[CoF] Careers of the Future
Launch Lab Connection
Competency
Status
Feedback Needed
Sewing Machine Tutorial
- Sewing Machine Tutorial
- Reference Photos
- Setting Up:
- Turning on the Sewing Machine
- Putting in the lower thread
- Putting in the upper thread
- Connecting the upper and lower threads to the presser foot
- You’re now ready to Sew!
- Sewing - The basics
- Backstitching
- Sewing the pocket together
Reference Photos
Anything referred to in this tutorial will be here. You will know something is being referred to if you see something looking like see x. Refer to these to see where they are and what they do. You do not need to know what every one of these do.
/w=1920,quality=90,fit=scale-down)

- Auto raise/lower needle
- Cut thread. Presser foot needs to be down - see m.
- To use two needles at the same time.
- Speed dial - increases/decreases speed. Use lower speed if you are new to the machine.
- Auto lock - ties a knot to secure the thread (I don’t know how this works).
- Reverse stitch - While holding this down, you will sew backwards.
- Auto sew - If you cannot use the foot pedal, disconnect the foot pedal and hold down this button to sew. Release button to stop sewing.
- Manuel raise/lower needle. Turn the wheel towards you to raise/lower the needle. By facing you, have your thumb facing away from you and then turn so that your thumb is now facing upwards.
- Changes the mode so you can select different types of stitches. Clicking this increases the mode by 1.
- A place to cut thread. On the side of the sewing machine that looks like a quarter circle.
- The thread and also the the thread holder.
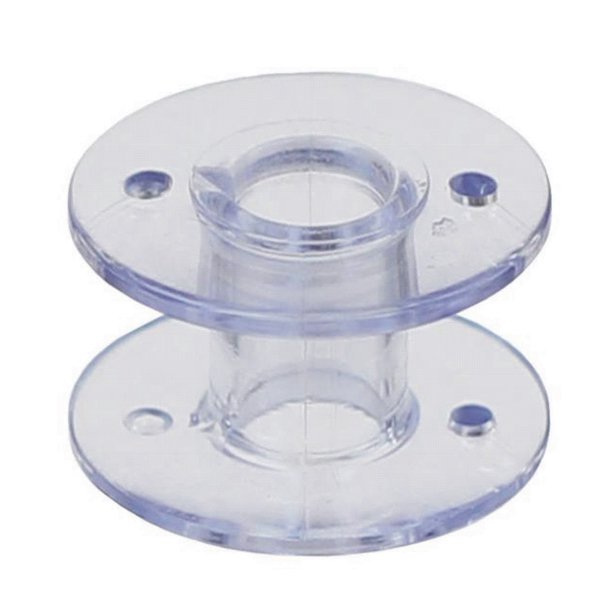
- Bobbin holder for when you wind the bobbin.
- Raise/lower presser foot - see r.
- Release presser foot
- Auto threader - pull this down when the needle is fully up to use.
- Metal bar #1 needed to wrap thread around when getting thread from spool to needle. Wrap from right to left.
- Metal bar #2 needed to wrap thread around when getting thread from spool to needle. Wrap from left to right.
- Presser foot.
- Needle
- Push to the right to open bobbin holder - see u
- Bobbin holder cover. Bobbin is underneath. See diagram on cover for how to set up the bottom thread.
- Holder for presser feet, tools, bobbins, etc.
Setting Up:
Turning on the Sewing Machine
- Take off the white cover and open the bag with the pedal and power cord in.
- On the right side of the machine, plug the power cord into the machine and an outlet and then plug the foot pedal into the machine as well.
- On the right side of the machine, turn on the power button. You’re now set up and ready to begin!
Putting in the lower thread
- If there is already upper and lower thread in the machine, you’ll still want to do these steps so you can learn.
- Press the black rectangle at the bottom right of the medal plate on the sewing machine to the right to get access to the bobbin see t, the wheel that holds the lower thread.
- Take out plastic covering and the bobbin underneath see u. Keep these in an easily accessible place.
- Get a bobbin from the container in the front of the machine see v. Just pull down and a box should open.

- If not already there, put a spool of thread onto the top of the machine
- Take off the spool holder.

- Put in the spool so that the middle hole goes through the cylinder see k.
- Put the spool holder back on, with the flat side towards the spool and the teeth facing outwards.
- Following the dotted lines on the top of the machine, thread the thread through the top part of the screw on the top left of the machine so that there is tension.

- Put the bobbin on the metal cylinder see l that sticks up on the top right.
- Thread the thread through one of the holes in the bobbin from inside to outside of the machine and then physically push the bobbin to the right.
- Hold the thread vertically up and then use the foot pedal to wind the bobbin. Eventually the top of the thread will snap off, this is perfectly fine and when it does that you no longer need to hold it up. Wind until the machine stops and that’s when you know you have a fully wound bobbin. To speed up the the process, you can push the speed dial see d all the way up
- Push the bobbin back to the left and take it off the metal cylinder
- Cut the thread using the thread cutter that is a quarter circle on the left side of the machine see j.
- Put the bobbin back in the bobbin holder see u with the thread going out leftwards, looking like a p.
- Wind the thread from the right to the metal bar to the left and then towards the back of the machine like the diagram on the bobbin holder covering shows.

Putting in the upper thread
- Turn the wheel on the right towards you until you see a metal hook pop up on the top left of the machine
- Bring the black lever, the foot presser lever, that is behind above and to the right of the needle see m up to raise the presser foot.
- Follow the solid lines to bring the thread from the spool
- around the bottom of the sticking up rectangle of plastic on the top of the machine
- Down and then under the bit of plastic sticking out on the lower part of the top of the machine
- Back up and around the metal hook
- Back down and from right to left on the backside of the metal plate below the top of the machine see p
- Around the metal hook just above the needle see q


- Now, it’s time to thread the thread through the eye of the needle, you can do this 2 ways.
- Way 1 - Using trial and error, try to stick the thread through the eye of the needle, from forwards to back until it goes through. It can be helpful to put a white piece of paper behind the needle so that you can see the thread and the eye a lot easier.
- Way 2 - Use the Auto Threading ability see o. This is a more complicated but faster way to do this.
Connecting the upper and lower threads to the presser foot
- For the upper thread, just thread it through the hole in the middle of the presser foot.

- For the lower thread:
- Pull the upper thread backwards with tension. Continue pulling the thread back and holding the tension for the entire time.
- Turn the wheel on the right side of the machine towards you see h. You should see the upper thread cross the lower thread and then pull the lower thread up.
- When you can see the lower thread under the presser foot in a loop, stop turning and grab a stick like object such as a pencil or the seam ripper. Put the stick through the loop in the lower thread and pull backwards until the thread goes all the way through and there are just two threads going backwards through the presser foot.
- Put the plastic covering over the bobbin holder see u.
You’re now ready to Sew!
Sewing - The basics
- Positioning and starting sew
- Sewing down, turning, turning again
- Finishing stitch, cutting
We’ll start off sewing by making a pocket.
Backstitching
- Every time you ever start or stop sewing, you will always make a backstitch.
- Get two pieces of fabric that are the same size and line them up.
- Position the fabric so that the needle is in the top corner of it, but there is a little fabric, seam allowance, both above and to the side.
- Using the lever above and behind the needle, the foot presser lever, see m lower the presser foot.
- Using the wheel to the right of the machine see h or the auto lower button see a, lower the needle down.


- Very Important! Keep your fingers away from the needle! Try to have your fingers not over the metal plate at any time. You will need to keep shifting your hand down while you sew.
- We’re now going to perform a technique called “backstitching” to anchor our thread in place so that it doesn’t fall out.
- Make sure the speed dial is all the way down see d.
- During steps c and d, hold down the fabric so that it stays straight.
- Press the foot pedal down until you make 3-5 stitches and then take your foot off to stop
- Hold down the reverse button see f and then press on the foot pedal. This will make a stitch in the reverse direction. Make the same number of stitches backwards as you just did forwards.
- Release the reverse button and press on the foot pedal so you make the same number of stitches again so that you are now at new fabric.
- Congratulations, you just made a backstitch which will secure the thread.
Sewing the pocket together
- Hold down the foot pedal and continue sewing down until we reach the end of the fabric.
- Now that we've reached the end, we want to turn the fabric.
- Raise the foot presser using the foot presser lever see m.
- Rotate the fabric 90 degrees so that now the needle is in the top corner of the fabric.
- Lower the foot presser using the foot presser lever.
- Repeat steps 1 and 3 until you have sewed 3 sides together.

- Make another backstitch to secure the thread in place.
- Press the auto cut button see b at the top of the sewing machine to cut off the thread.
- Raise the needle and the presser foot and take out your pocket!
Congratulations, You just made your very own pocket!
If you want to make a Tote Bag, Go to this next tutorial: Here