- What is a Husky lens?
- Wiring with Arduino
- Machine Learning with Husky Lens
- Color Recognition
- Face Recognition
- Husky lens can also do line tracking, object tracking, object recognition, tag recognition, & object classification….
- Installing Husky Lens Arduino Library
- Connecting to Arduino Uno
- Not sure what port you are using?
- Getting Started Code (Husky Lens + Arduino)
- Let’s Upload Some Testing Code!
What is a Husky lens?
HuskyLens is an easy-to-use AI machine vision sensor with 7 built-in functions: face recognition, object tracking, object recognition, line tracking, color recognition, tag recognition and object classification AND CAT EARS :))).
Through the UART / I2C port, HuskyLens can connect to Arduino and micro:bit to help you make creative projects without playing with complex algorithms.

Wiring with Arduino
To start creating a project with the Husky Lens we have to start by connecting it to a microcontroller. Let’s start with Arduino!
Husky Lens comes with its own connection wires so we will use those.
GREEN WIRE → PIN 10
BLUE WIRE → PIN 11
BLACK WIRE → GND (GROUND)
RED WIRE → 5V (POWER)
Beyond Possible Board Hook-up
Plain Arduino Hook-up
Adding Husky Lens to Base Bot
To mount the Husky Lens you will need Husky Lens bracket, laser cut spacer, 2 long bolts, 2 locking washers, & 2 nuts.
Make sure all your parts are in the same order as this nifty diagram :)


Machine Learning with Husky Lens
Color Recognition
Face Recognition
Husky lens can also do line tracking, object tracking, object recognition, tag recognition, & object classification….
Installing Husky Lens Arduino Library
The Husky Lens library gives us the ability to take to values given to us by the camera and easily use them in our code. We have to add this library to our Arduino IDE manually to be able to use it.
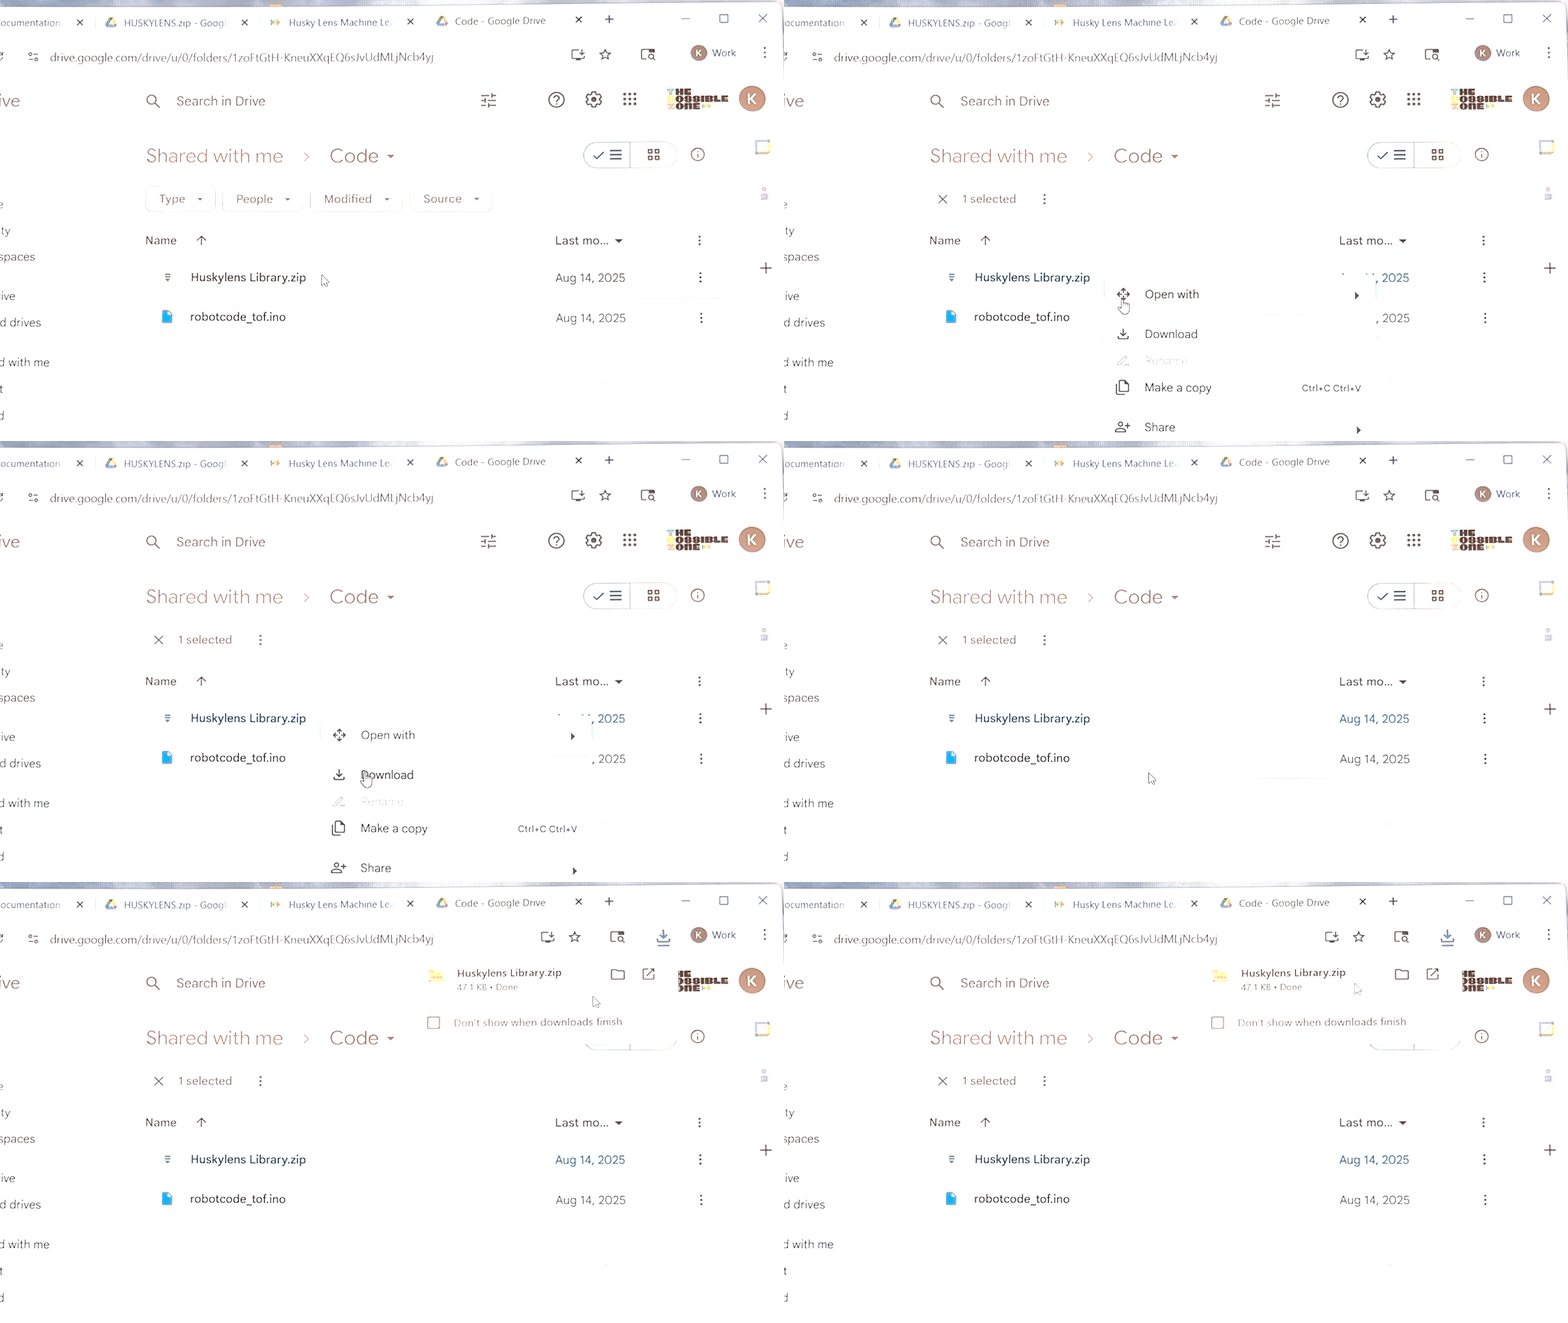
VV Click on this link to open a drive folder holding the Husky Lens library. VV
drive.google.com
drive.google.com
Click with two fingers and download “HuskyLens Library.zip”

Go to Arduino IDE
Sketch → Include Library → Add .zip Library → Downloads Folder → HuskyLens Library.zip
Open!

If you did it right you should see a “Library installed” message in the black box at the bottom of your sketch!
Connecting to Arduino Uno
When you plug your Arduino into your computer it does not automatically connect.
We need to tell our computer what kind of Arduino we are using and where we plugged it in before we can upload any code to it.
Arduino Uno → Select other board and port → type in and select “uno” → select port

Not sure what port you are using?
Getting Started Code (Husky Lens + Arduino)
We will be using on of Husky Lens’s library examples in Arduino to test that our camera is trained correctly and giving us the data we need.
YOU NEED TO HAVE THE HUSKY LENS LIBRARY INSTALLED TO USE THIS EXAMPLE!
FILE → EXAMPLES → HUSKYLENS → HUSKYLENS_GET_STARED

This will open a new sketch that helps us better understand the data we're receiving from our Husky Lens.
Let’s Upload Some Testing Code!
Click on the “→” button on the top left and see the progress bar as the code uploads to Arduino.
Click the “ ” button on the top right to open the serial monitor and view data coming from the Husky Lens.

Husky lens gives us the position and size of a block (the boundary edge of a face, color, object, or tag it has been trained on) or the length and position of a line (used in line tracking).
Husky Lens will give us a string of values
Block: xCenter, yCenter, width, height, Block ID #
or
Arrow: xOrigin, yOrigin, xTarget, yTarget, Arrow ID #
We will use this string of values to code our project do different things triggered by the Husky Lens’s camera vision.
If you are getting values back…. CONGRATS YOU DID IT!!! Time to incorporate Husky Lens into a new project :)

