- An Introduction to Molding and Casting
- What is Mold Making?
- What is Casting?
- 🚨 Safety Info 🚨
- Tools and Materials
- Molding
- Before Getting Started
- Building the Mold Wall
- Measuring and Cutting the Mold Walls
- Assembling the Mold Walls
- Creating our Mold
- Mixing the Silicone
- De-Gassing the Silicone
- Pouring the Silicone
- Demolding
- Casting
- Prepping our Mold
- Casting in Resin
- OPTIONAL: Embedding Metallic Powder
An Introduction to Molding and Casting
What is Mold Making?
Mold making is the manufacturing process of creating an exact negative space of a given object in order to create exact replications of it using casting materials. Mold making is widely used in manufacturing when needing to replicate an object multiple times, such as toys, jewelry, automotive parts, and even medical devices. Various materials are used to create molds for various applications such as plaster and urethane. You’ve probably had a mold of your teeth taken at the dentist at some point using a material called alginate, which is designed for dentristy and other applications for the body. But the most common material used for creating reusable molds is silicone, a rubber-like material that doesn’t stick to most materials and can be used for dozens of castings.
What is Casting?
Casting, often referred to as resin-casting or by whatever material is being used, is the process of creating an exact replication of an object using the negative that is a mold. Casting has a wide range of materials that you can use, such as wax to create candles or metal to create tools. But most often for hobby and recreational practices, we use resin, a solid plastic material designed for replicating castings.
🚨 Safety Info 🚨
We’ll be using some different tools and materials, so there are some things to keep in mind when using them
- Always wear either nitrile or vinyl gloves when handling silicone or resin to protect your skin. Latex can inhibit the curing of silicone so its best to avoid using them.
- Resin cures as an exothermic reaction, meaning it releases a lot of heat as it sets up. Do not get any on your skin and do not stick your fingers in the resin, or you will burn yourself.
- Try not to get any on your clothes either, it will not come off if it spills on it.
- When using a box cutter or X-Acto knife, make sure to be cutting away from your body to avoid cutting yourself.
- When using the hot glue gun, don’t let the hot tip or glue touch your hands to avoid getting burned.
- When using the vacuum chamber, make sure the lid is sealed before turning on the pump. Keep an eye on any materials you have inside so that it doesn’t overflow and spill, and make sure when you’re opening the red valve that you are doing so slowly to avoid materials splattering inside the vacuum chamber.
Tools and Materials
General Need:
- Stir sticks
- Mixing cups
- Nitrile/Vinyl Gloves
- Vacuum Chamber
- Mold Release Spray
Mold-Making:
- An original model
- Molding Silicone Rubber
- Hot Glue Gun and Sticks
- Cardboard/Foam Board/Plastic Sheeting
Casting:
- Solid Casting Resin
- Gold Mica Powder
- Paintbrush

Molding
Before Getting Started
Before we can begin molding, we need something to create a mold of. The model you’ll be molding will determine what kind of mold you’ll be making. The more complicated the model, the more complicated the mold will need to be. For our purposes, we will be replicating a medallion and a gem, both simple models with a flat bottom lend themselves to simple block molds.

A block mold is a simple one-part mold where the molding material (in this case, silicone) is poured onto a glued down model with simple walls built around it to create a block shaped mold. For our project, we will be creating a mold of a Chimera Medallion that was printed on our Nylon 3D printer. You may be using a very different object as your model, just make sure it has a flat face that we can glue to the base of our mold wall.
Building the Mold Wall
The first thing to consider when building your mold walls is what material you’re going to use. Like the mold itself, it helps to look at the model to determine this. A bigger model may require a stronger material, such as plywood or thick acrylic sheeting. For a smaller model like ours, we can use materials that are much easier to work with. Cardboard, thin acrylic, you can even 3D print custom mold walls designed specifically for your model. For our mold walls we’ll be using foam poster board.
Measuring and Cutting the Mold Walls
When measuring the mold wall lengths, we want to give our models about 1/2 inch of space between them and the walls. We also want to add some additional length to the mold walls so that we can overlap walls to reinforce them and allow for some room for error.
Use a ruler to measure and mark the lines for the mold walls.


Using a ruler as a straightedge, cut the foam board using a sharp box cutter. Foam can easily dull a blade so it is best to cut the foam board in two to three shallower cuts rather than trying to cut throught the foam board at once. This will also help you control the direction of the blade so it doesn’t go off the cut line.
Assembling the Mold Walls
We will be using hot glue to assemble our mold walls. Hot glue does not inhibit the curing of silicone like super glue, and it can more easily cover the edges of the walls to prevent leakage.
- Begin by gluing the model down to the foam board base. Try not to have it too close to the edges of the model to prevent it squeezing out, and make sure it is as flat on the board as possible to minimize silicone squeezing under the model. It likely will anyway, but the less that squeezes through the better for the mold.
- Once the model is glued down, mark the perimeter of the mold walls if you haven’t already. Apply glue to the bottom edge of one of the mold walls and glue it down, making sure to hold it steady until it cools and sets. Once it sets, apply glue to the bottom edge of the next piece and the edge connecting to the first wall. Repeat these steps until all walls are glue together.
- Once all the walls are glued together, we want to make sure all the edges are sealed so the silicone doesn’t leak out. Apply a line of hot glue to all edges, both connecting and bottom, making sure there are no gaps or air bubbles in the glue. This will reinforce the edges to prevent leaks.

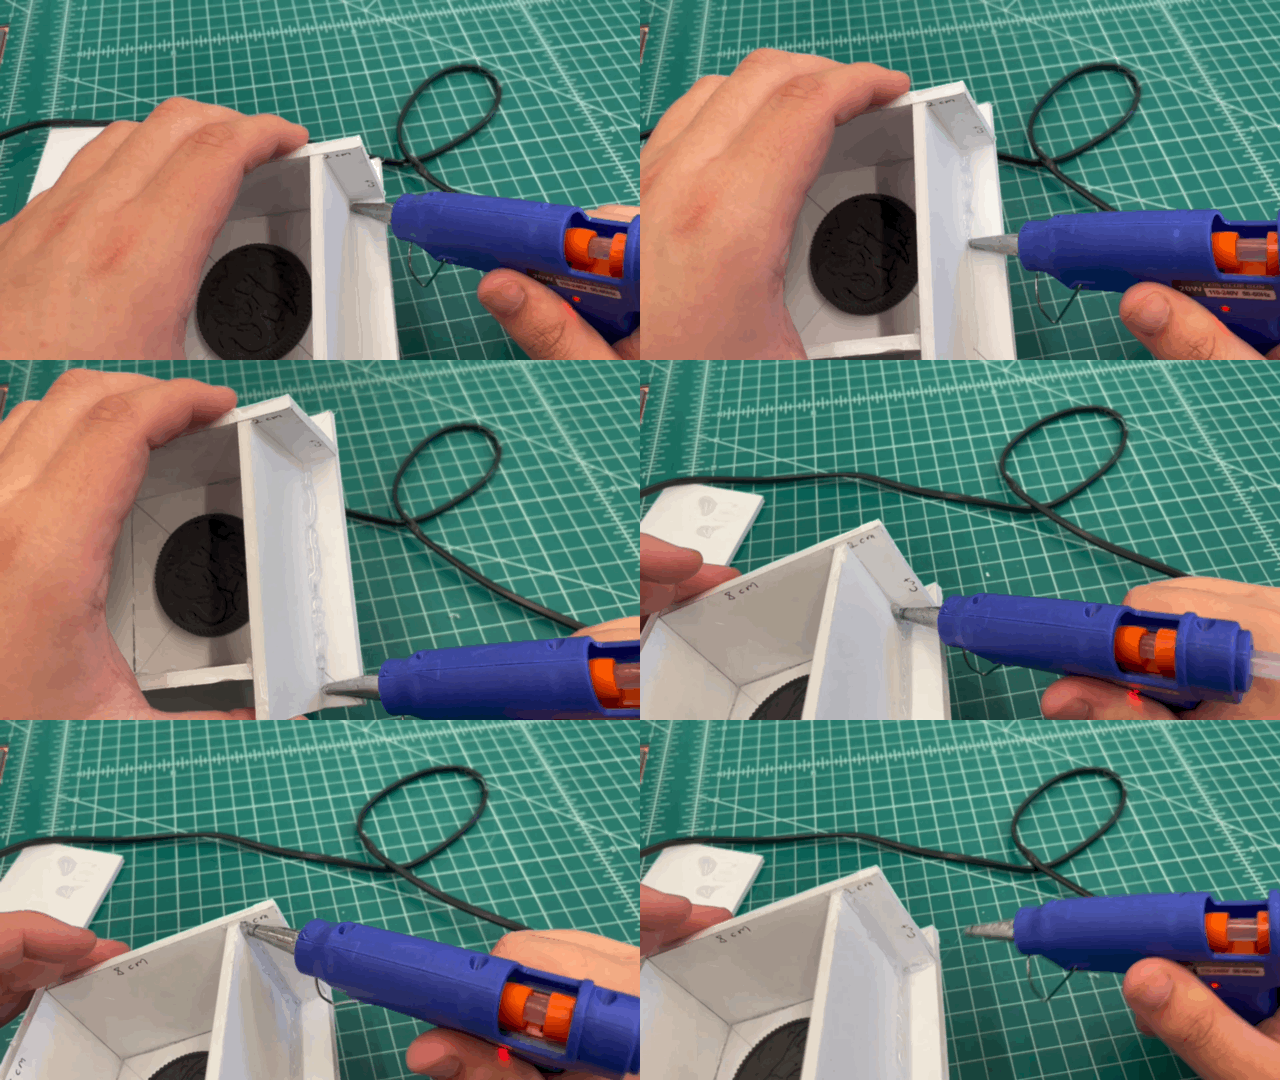
Once the glue is set, we now have our mold walls and are ready to create our molds.
Creating our Mold
Now that we have our models and mold walls ready, we can now create our molds. While you may be able to get away with just mixing up your silicone, but in order to avoid air bubbles affecting the surface of the mold we will be removing all air bubbles using a vacuum chamber.
When mixing silicone, it is imperative to not only wear disposable gloves, but to wear non-latex gloves. Latex can prevent silicone from curing when they come into contact, so it is best to use either vinyl or nitrile gloves when mixing.

Mixing the Silicone
For this project, we will be using Oomoo 30 Silicone Rubber. This silicone has a 1:1 mix ratio by volume, meaning we will be mixing equal parts A and B to create the mold.
- Before we begin, make sure you’re wearing either nitrile or vinyl gloves, not latex. Latex will inhibit the curing of the silicone if it comes into contact with it, so we want to avoid it entirely.
- To start, give both bottles a good shake before opening. Premixing will make sure the final product sets up properly and has the proper tear strength.
- Pour equal parts A and B of our Oomoo 30 into a mixing container. Make sure you know how much silicone you’ll need and that you don’t mix too much and waste it. Make sure your container can hold more than double the total volume of silicone.
- Using a wooden or plastic stir stick, mix the two parts together until it is one unified color. Scrape the sides and bottoms of the container to minimize streaking. There may still be some streaks left, but if its minimal then it won’t affect the final cure.
De-Gassing the Silicone
At this stage you’ll likely notice that your silicone is full of air bubbles coming up to the surface, with more hidden beneath. To evacuate these air bubbles, we’ll be using the vacuum chamber.
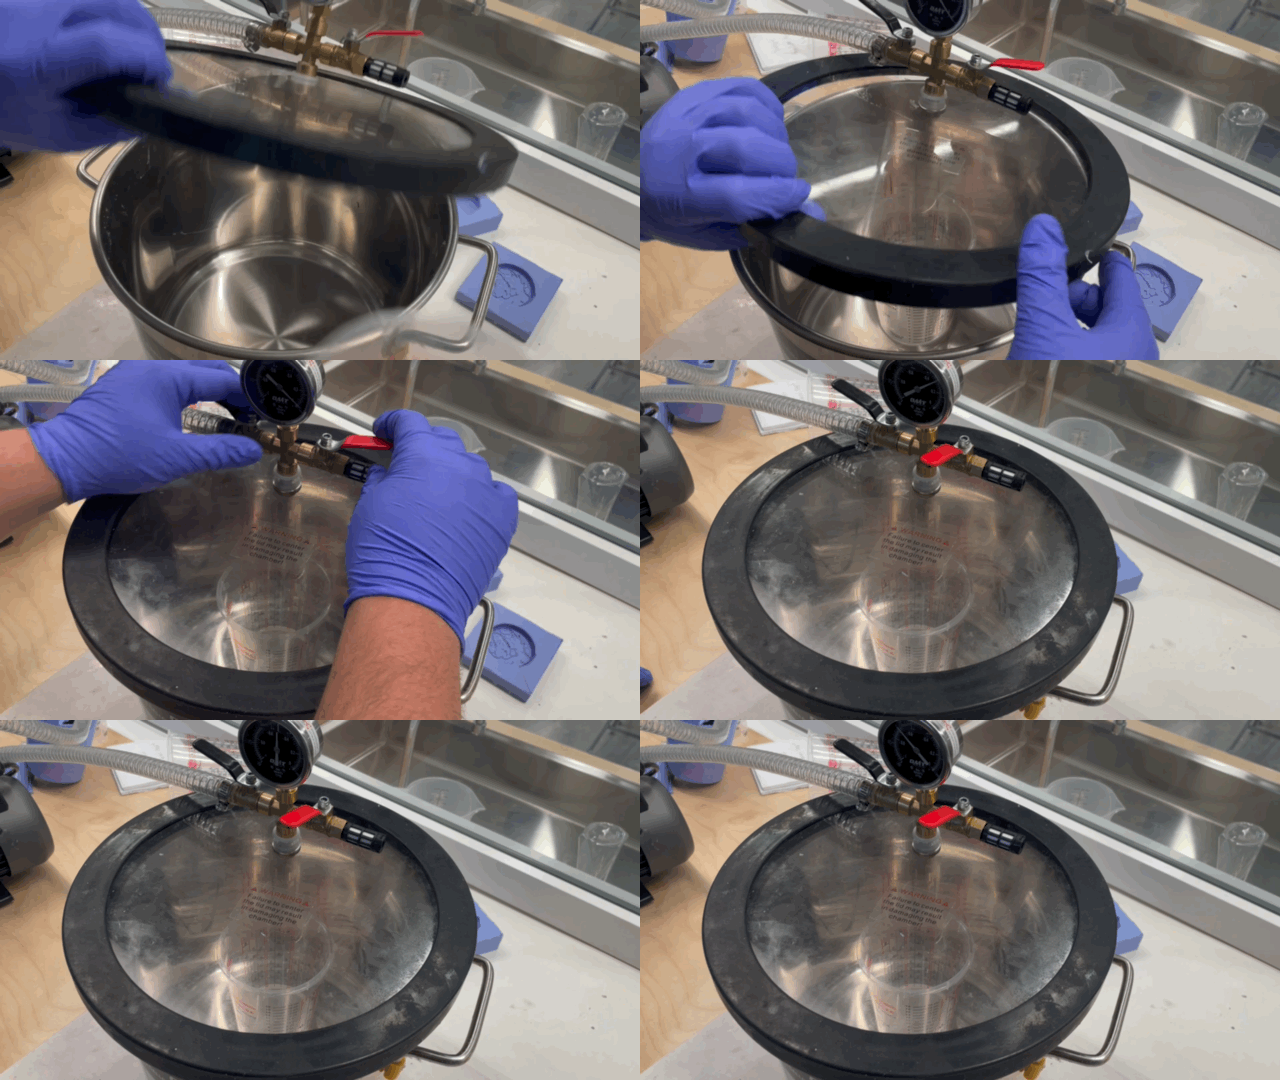
- Place the container into the chamber pot, and place the lid on top, making sure it is sitting flat on top and sealed evenly on all sides.
- Make sure that the valve switches are positioned pointing to the sides of the valve, the valve is facing you, and that the oil is between the minimum and maximum marked on the end of the vacuum pump.
- Once you’ve made sure all parts are as needed, switch the vacuum chamber on and slowly turn the red switch towards you. The valve will slowly rise as the pressure increases until it settles between -25 and -30.
- If it does not rise to this level or at all, turn the red valve back slowly and switch the pump off, and make sure the lid and hose are secured as needed.
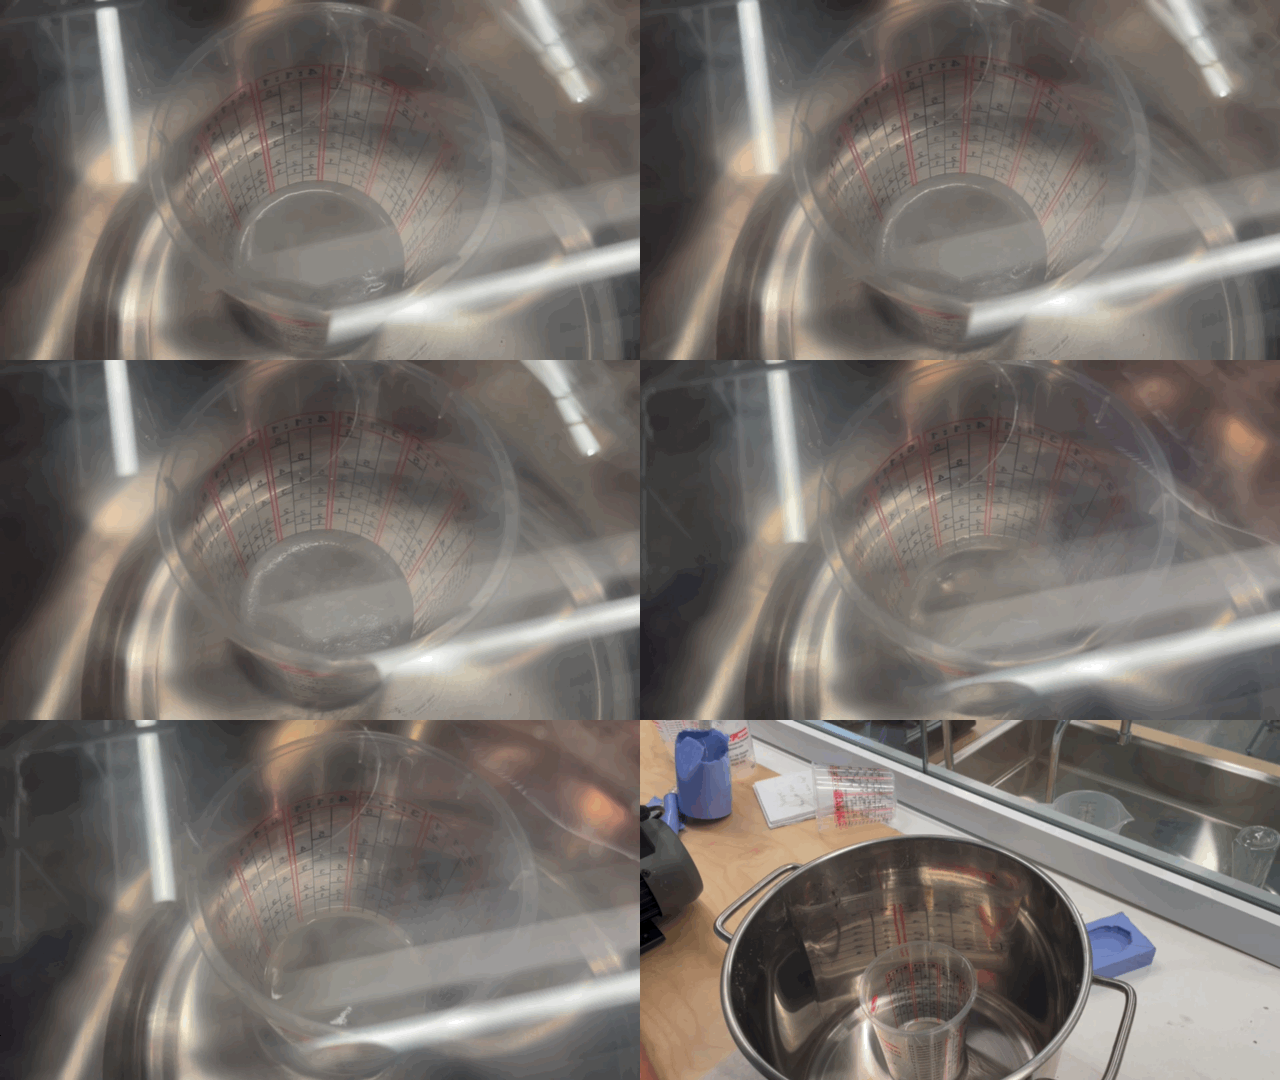
At this point you’ll notice that a lot of air bubbles are starting to rise and pop. Keep an eye at this stage so that it doesn’t overflow.
- Once the silicone rises close to the edge of the container, slowly turn the red switch back to the side position to open the vacuum and let air back in. Let the silicone settle back to the bottom of the container, and slowly close the switch again.
- Repeat these steps as many times as needed, likely between 3-5 times.
- Eventually the silicone will start to collapse before reaching the edge of the container, meaning most of the air is evacuated. You can leave the valve shut at this stage and let the vacuum chamber run as it evacuates the remainder of the air bubbles.
- Keep in mind the pot life of the silicone. Oomoo 30 has a 30 minute pot life, meaning that it takes 30 minutes from when your start mixing to begin setting up. Keep an eye on the time to make sure it doesn’t begin setting up inside the vacuum chamber.
- Once there is a tiny amount of air bubbles on the surface and popping, you can slowly shut the red valve to pop the ones remaining. If there are still a couple left, thats okay, they won’t affect the final mold.
You have now successfully used a vacuum chamber to de-gas silicone!
Pouring the Silicone
Now that the silicone has been fully evacuated of air bubbles, we can pour it into our mold walls.
- First you want to spray the model with mold release in order to prevent tearing and issues when demolding.
- There’s a chance we still have a couple tiny air bubbles in the silicone. We can pop the remaining bubbles at this stage by pouring slowly into the corner of the mold in a thin steady stream. The thin pour will cause the bubbles to stretch until they pop.
- Try not to pour onto the model itself, as air can get trapped at this stage and appear on the inside surface of the mold and ruin it. Pour in the corner and let it fill.
- Pour until you have completely submerged the model and the surface of the silicone is 1/2 in. above the model.
Now we wait 6 hours for the silicone to cure. Once the time has passed, tap the molds to see if it is still soft and squishy or firm with some bounce. If its firm then its fully cured. You can also peel out any excess inside the container to see if its set.
Demolding
- Once you have verified that it is fully set, you can go ahead and tear down the mold walls. No point in preserving them so don’t worry if they tear, just get them off the mold safely.
- Once the mold walls are removed, slowly lift the edges and corners of the mold from the base until you feel it dislodge from the model. Slowly remove the mold to avoid tearing.
- There may be some flashing, or lifted edges of silicone, on the edges of the mold where we poured. Carefully trim those lifted edges off the mold using an X-Acto Knife, away from your hands and body.

Once the flashing is removed and the model is demolded, you now have a successful mold ready for casting!
Casting
Prepping our Mold
Now that we have our mold, it’s important that we take good care of it to ensure we get lots of castings out of it with little to no damage.
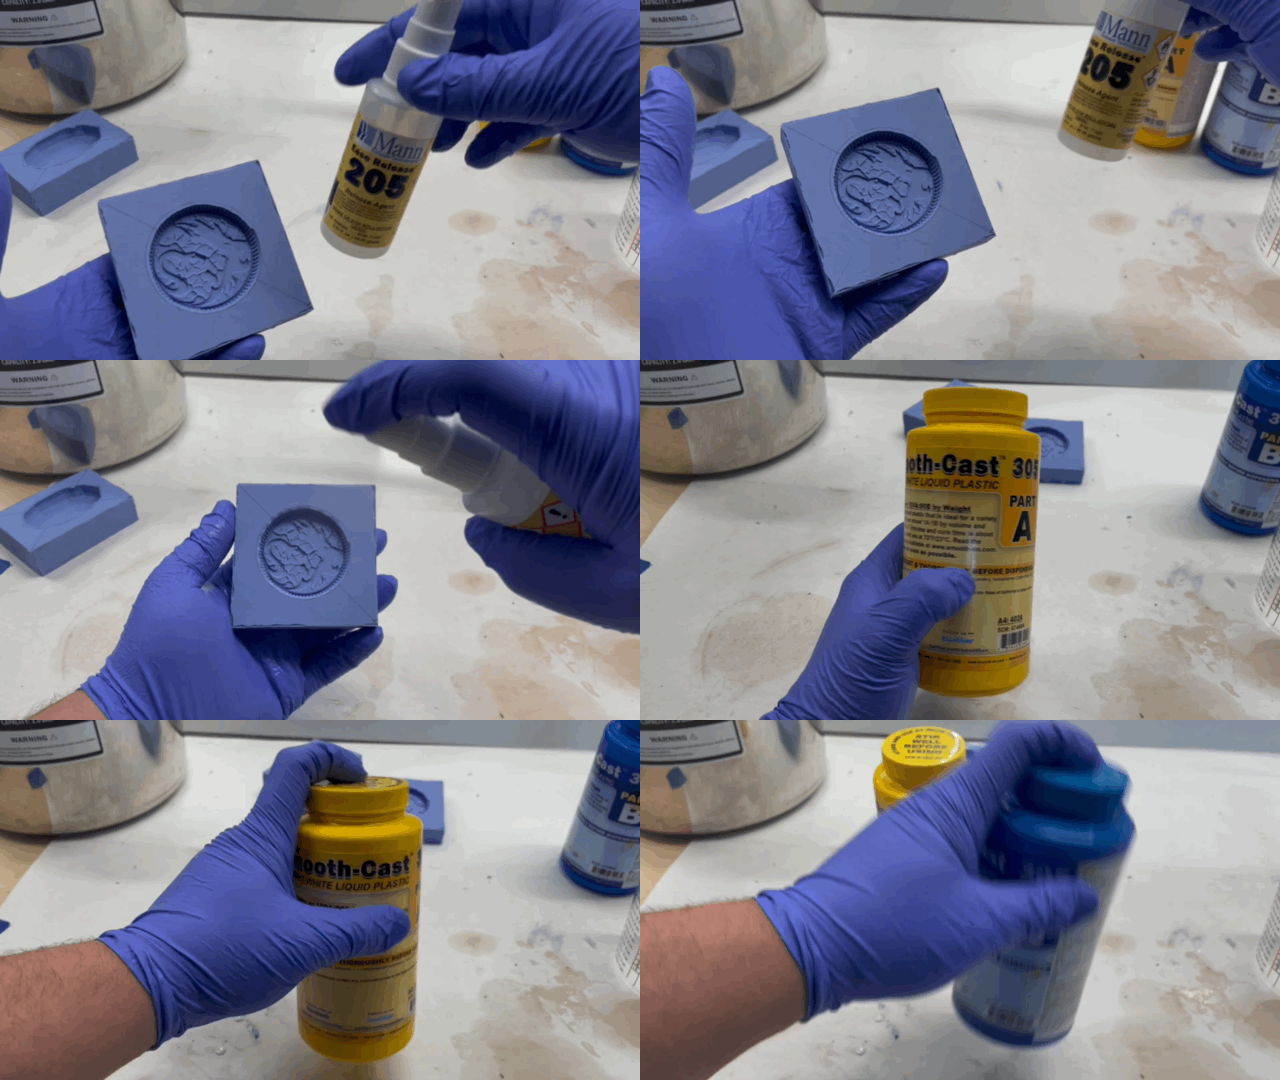
Begin by spraying the inside of the mold with a mold release spray. Even though silicone shouldn’t stick to resin once cured, this layer of protection will help the mold release from any cracks and crevices in the casting once demolded.
Casting in Resin
- Once the resin has been fully evacuated, slowly pour the resin into the mold. Try to pour slowly and in a thin stream so that any left over air bubbles can break on the way down.
- The resin will take about 30-40 minutes to cure, but since the casting is of a thinner object, we may want to give it a full hour to cure.
- Remember, resin curing is an exothermic reaction, meaning it releases heat as it sets up. The thinner the mold and casting, the less heat it is able to produce and therefore it may need more time to fully cure in the mold.
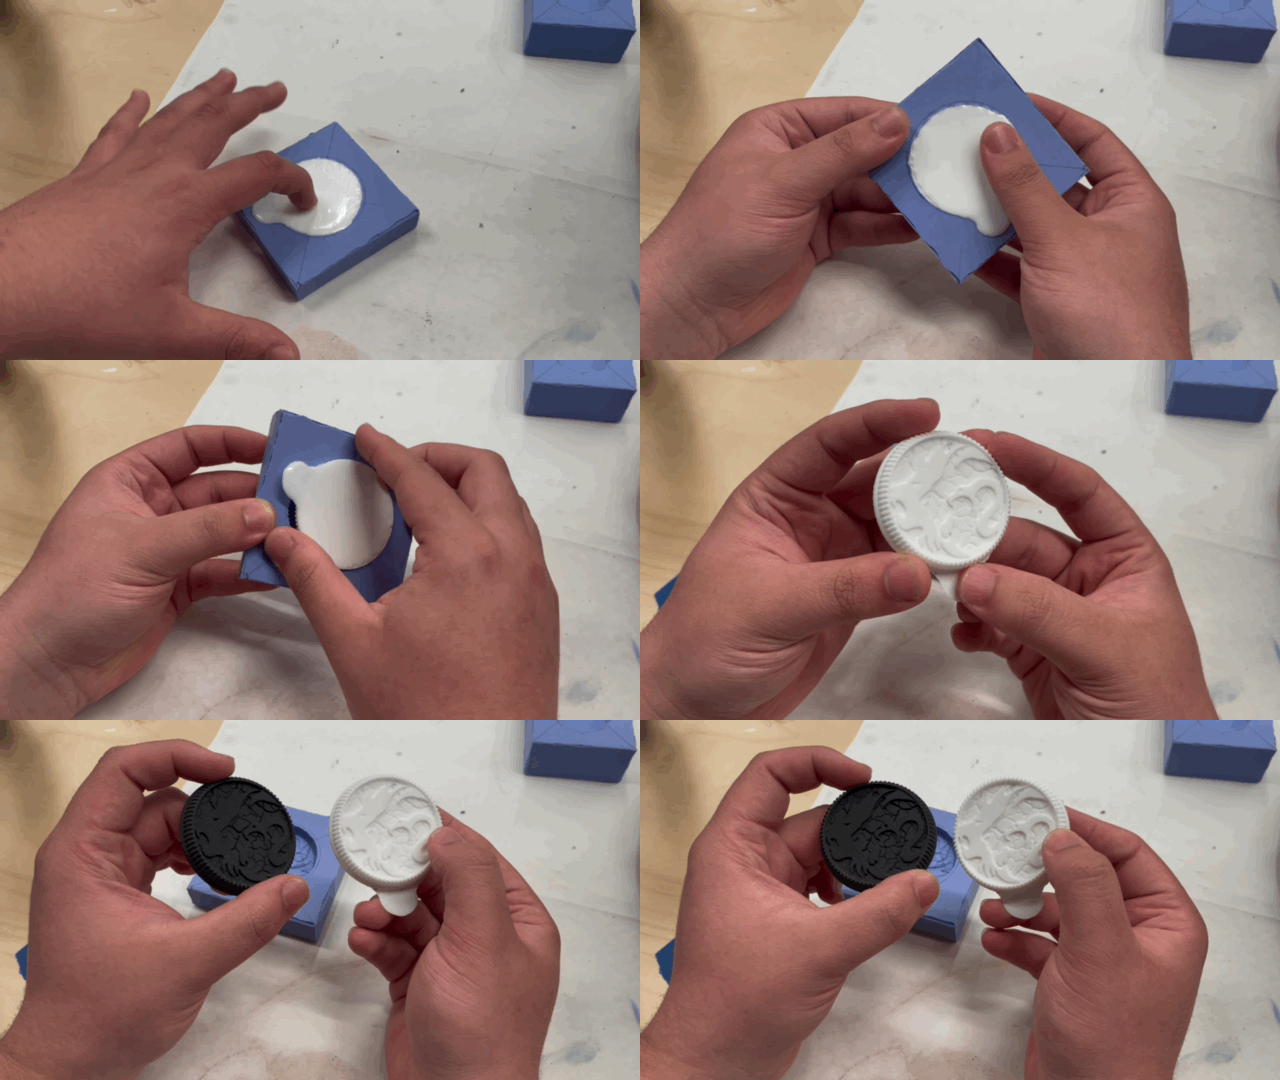
- Once the proper amount of time has passed, we can tap the casting to make sure it is fully cured. If you feel no looseness or softness in the resin, you can go ahead and demold the casting slowly, much like we did when we first made the mold.
- Check for any flaws or imperfections in the casting, such as cracks or silicone tearing and sticking to the resin. If it looks good, then we’re all set! We have a successful casting of our medallion.
Like we did with the silicone, shake and measure out equal parts A and B of your resin.
- For our purposes we’ll be using Smooth Cast 305, a low viscosity medium-curing resin.
- Low viscosity means that the resin is very thin, almost like water, whereas medium or high viscosity resins run thicker.
- Medium curing means that it cures in about 30-40 minutes, whereas the fast curing sets in about 10 minutes and the slow-curing in about 2-4 hours. This is important to note since we want enough time between mixing and curing to evacuate the air bubbles.
- Place the resin cup in the vacuum chamber and repeat what we did for the silicone, keeping an eye on the resin as it rises to make sure it doesn’t overflow, releasing the red valve if it gets too close.
- Repeat this step until all or most of the air bubbles are released from the resin.
/w=1920,quality=90,fit=scale-down)

OPTIONAL: Embedding Metallic Powder
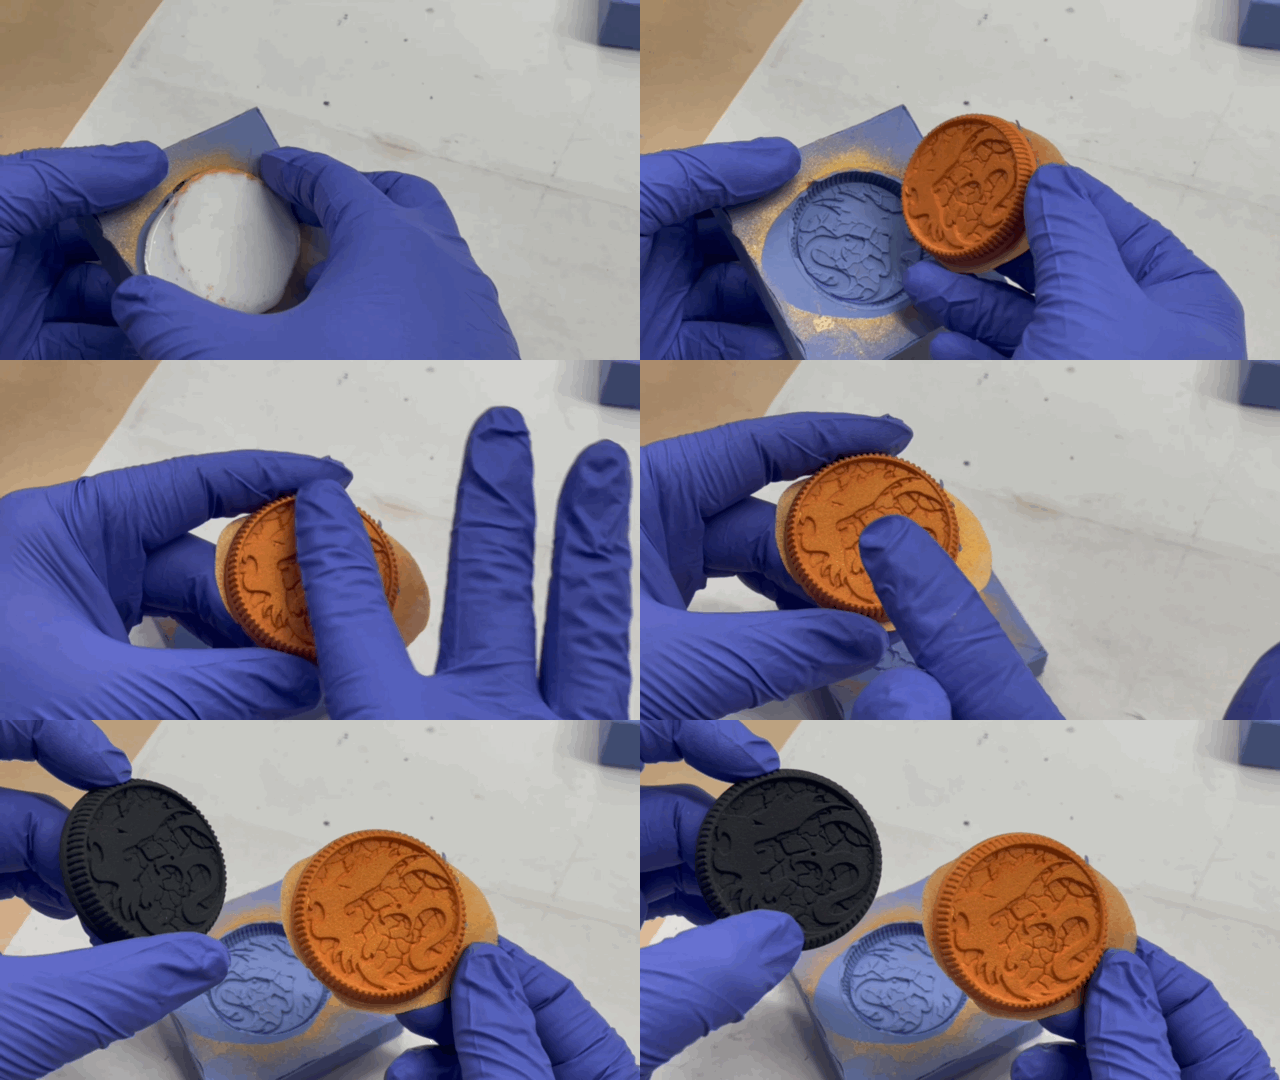
Now that we have our mold and casting, we can easily just paint it any color we want. However, there’s always the chance of paint rubbing off, so we may want to find a more permanent finish if we want to make it look metallic. Therefore, we’re gonna go ahead and embed a gold metallic powder into our casting.
- Using a paintbrush, gently dab the inside of the mold with gold powder, making sure to get all surfaces of the mold. Tap any excess powder back into the container
- Once you have mixed a new batch of resin and evacuated the air, slowly pour it into the mold and let it cure
- Once the resin is fully cured, you should be able to remove the casting from the mold with all the gold powder embedded on the surface. Rub your finger against it to make sure none is coming off.
- If all looks good, then we have successfully embedded a casting with metallic powder! Feel free to try with other colors such as copper or silver.

/w=1920,quality=90,fit=scale-down)
