
Project
Date Created
April 30, 2026
Author
U
UntitledTools & Skills
3d printer
[CoF] Careers of the Future
Launch Lab Connection
Competency
Status
Feedback Needed
‣
What is Bambu Studio?
- Bambu Studio is the native slicing software for all Bambu 3D printers.
- 3D printers cannot read 3d model files on their own. They need a software to translate the file into “slices,” so that the printer knows the right steps to follow in order to successfully print your file.
- This kind of software is called “slicing software.”
- You can pan by left clicking and dragging.
- You can rotate by right-clicking and dragging, or by using the square in the bottom left.
‣


‣
Prepare your file
- Download your file. Preferred file types are .stl or .obj
- Log into Bambu Studio with your TPZ email.
- It’s free, so make an account if you need to.
- Import your file by going to “File” > “Import” > Import 3MF/STL/STEP….

‣
Connect to the printer
- Sign into Bambu Studio using the following credentials:
- Username: fablabuser@possiblezone.org
- Password: B@mbu26
- Connect to the printer by going to “Device” on the top toolbar.
- In the top left select the drop down menu. Then select “Fab Lab Printer.”
- Once it connects, you’ll see the colors that are loaded into the machine in the bottom right.


‣
Lay out your file
- Once you import your file, your screen will bring you to the “Prepare” tab.
- Click on your model to select it.
- Then select “Autio Orient” on the top toolbar.
- This will automatically rotate the print in the optimal way to avoid unnecessary supports and make it look good.
- If you want the model to print in a specific orientation, you can use either the “Rotate” tool or the “Lay on Face” tool.
- First, select the model. Then select “Rotate” in the top toolbar.
- Once you have selected “Rotate,” your model will have a series of circles around it. Move the red arrow to rotate on the X axis, the green arrow to rotate on the Y axis, and the blue arrow to rotate on the Z axis.
- First, select the model. Then select “Lay on Face” in the top toolbar.
- This will cause different faces to be highlighted. Click the one you want to be the base of the model.
- Then, on your keyboard, click “a”. This will place the file in the center of your build plate. This is especially important when printing multiple items at one time.


‣


‣


‣
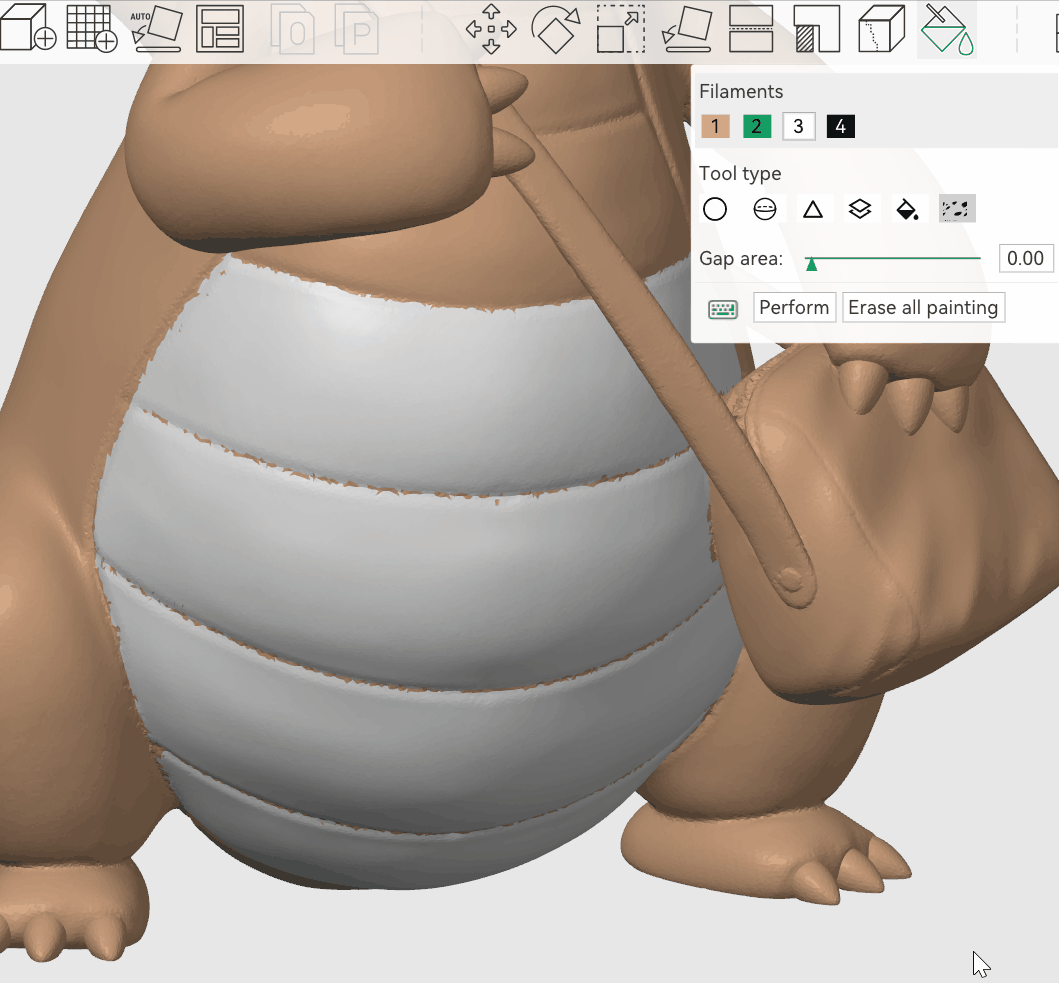
(Optional): Color your model! 🎨
- When using Bambu Studio, the Bambu printers we have can print in multiple colors on the same print!
- They are limited to the colors within their AMS, so check which colors are loaded before starting to color. Check here for instructions on loading new filament.
- There are multiple ways to tell the printer which parts you want to be which colors. To start, sync the software with the printer so that you’re only choosing from available colors. Do this by clicking the “sync filament” button.
- If you want to change the color of an entire model, select “Objects.”
- Next to your model is a square indicating the color filament it is set to be printed in. To change that, double-click it and then select the preferred color.
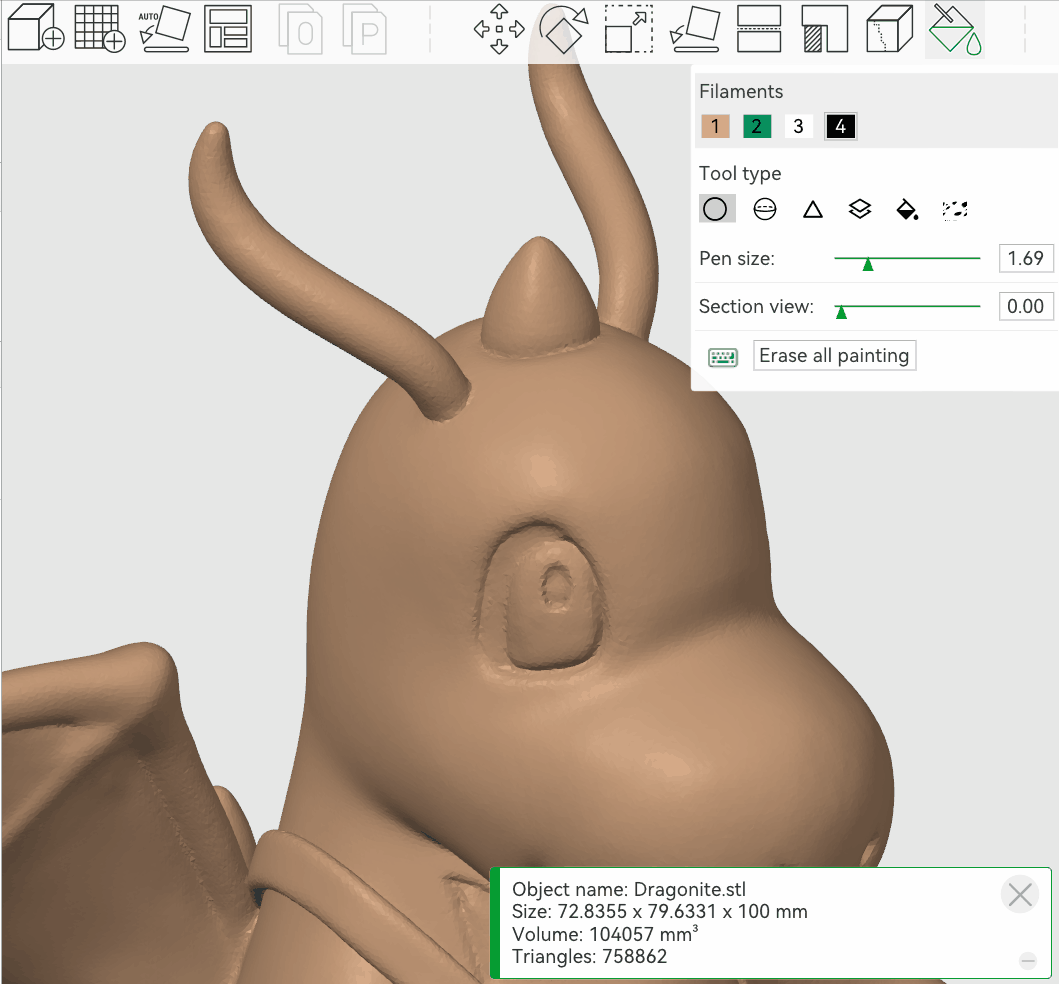
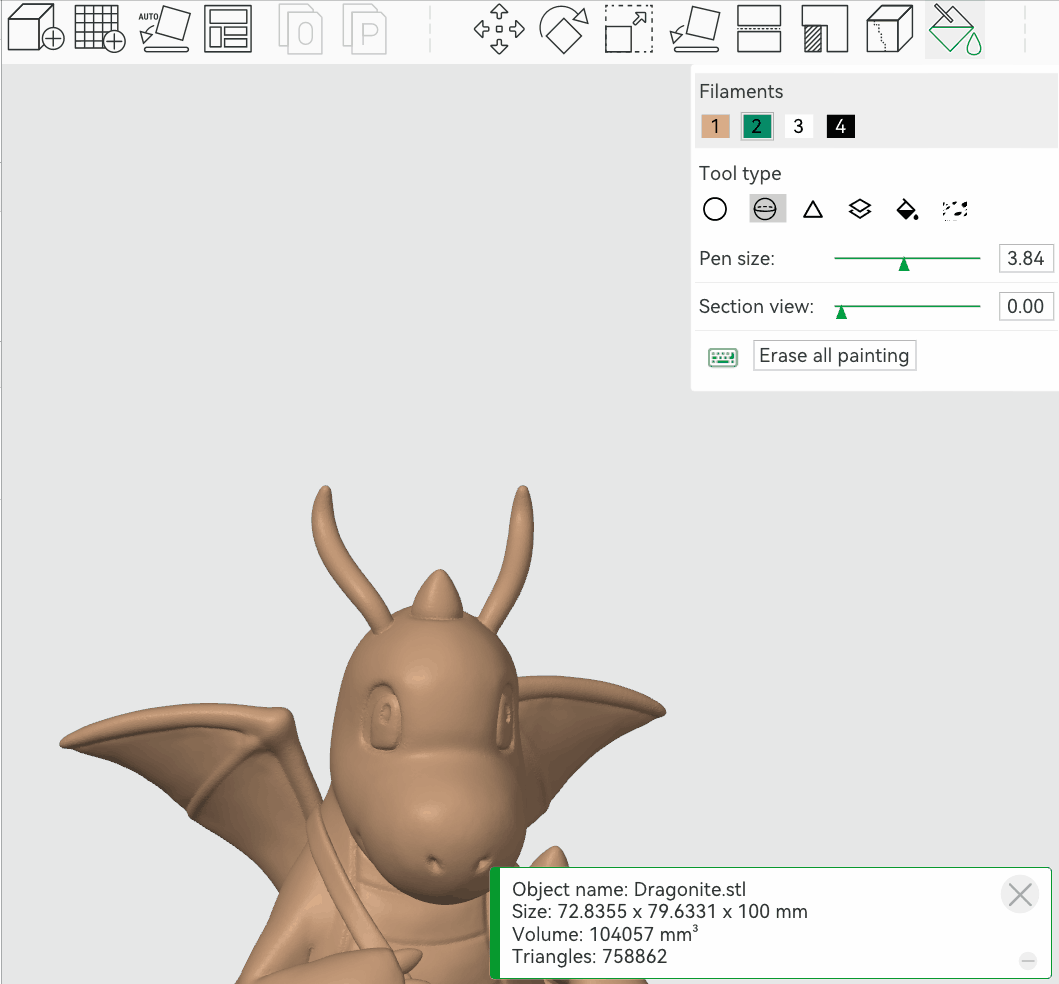
- If you want to paint different sections of the same model, you’ll select the “paint” tool.
- This will open a new window with multiple different tools you can use to color the model.
- The top shows the filaments that are available to print with. Select your color at the top, then choose your tool.
- Used to color the visible surfaces of a model
- Used to color all surfaces of a model (even those you can’t see)
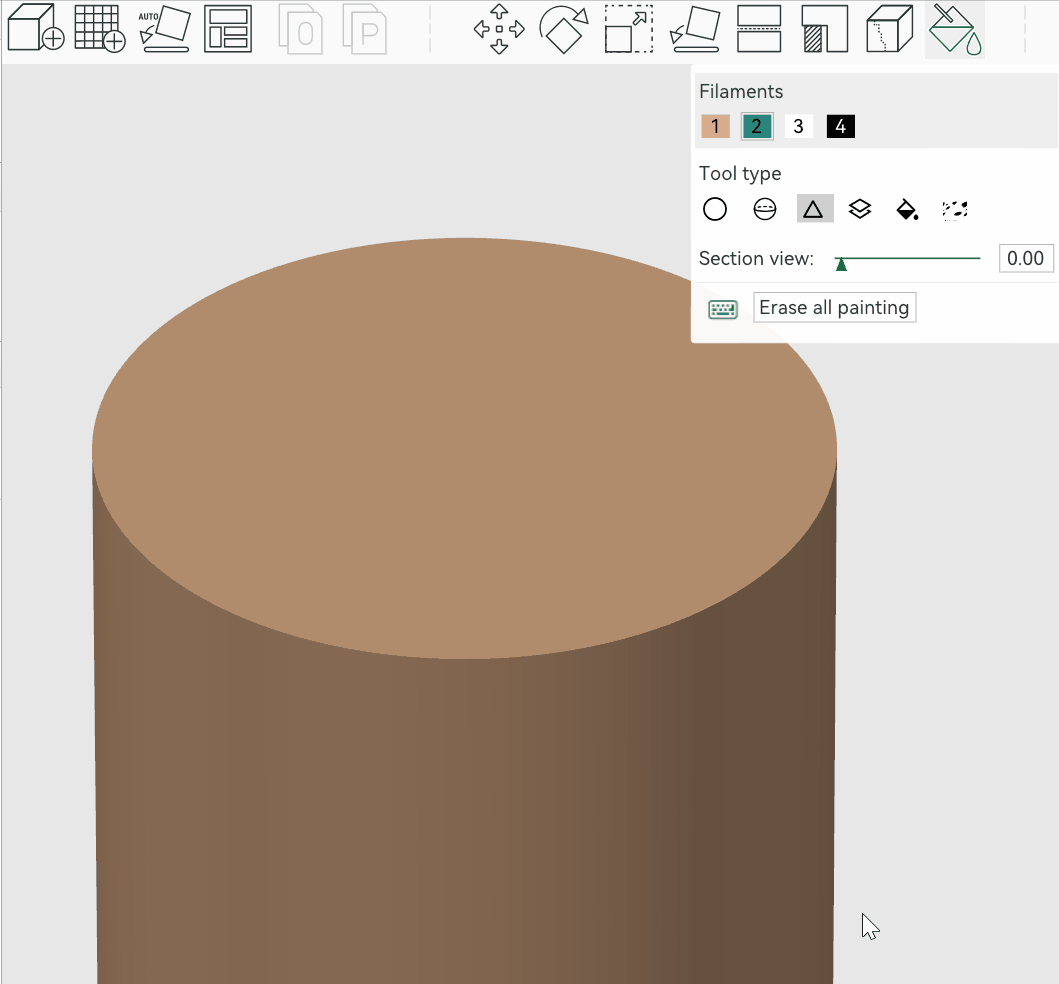
- Many 3D models are made of a bunch of triangles. These are called “meshes.”
- The Triangle tool will color in those triangles
- Colors everything within a given height range
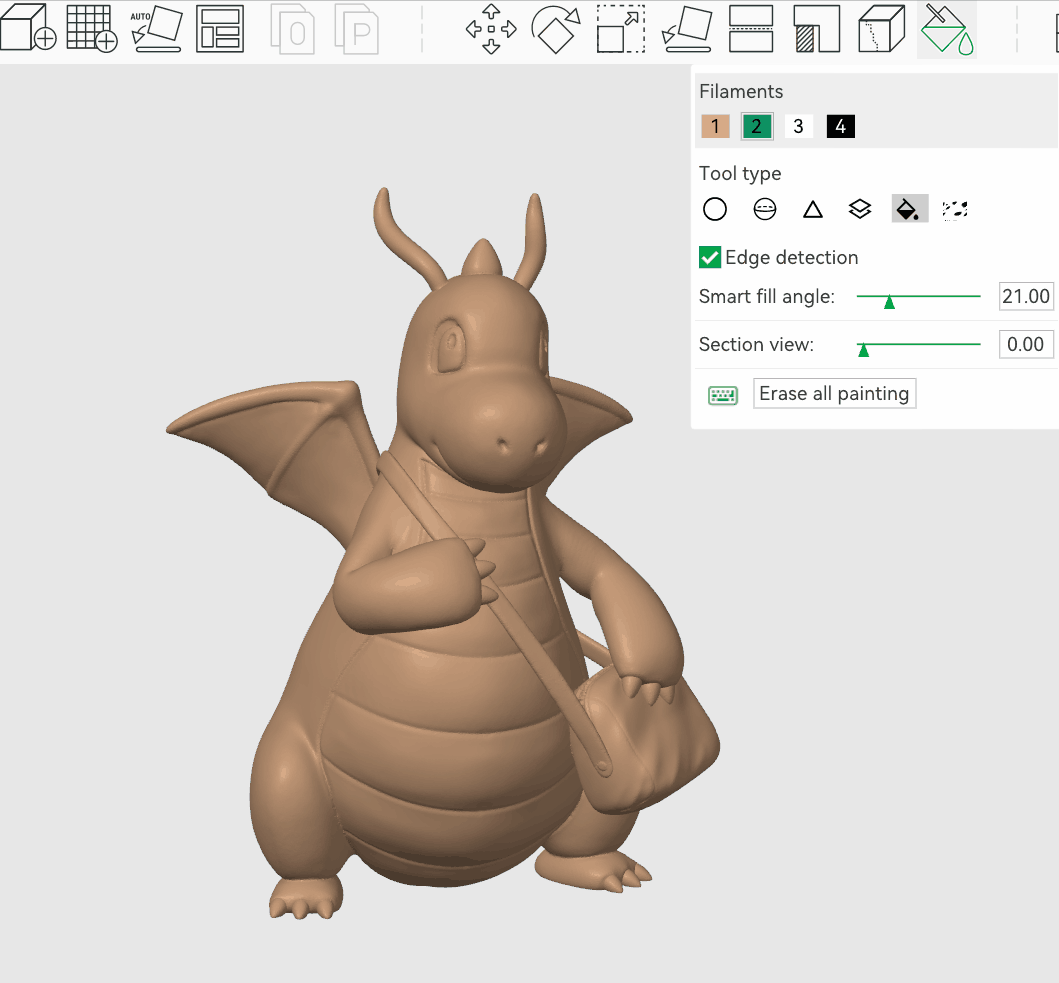
- The Fill tool will fill an entire section of your model with one color.
- When coloring with other tools, sometimes there are rough patches between the colors.
- Use Gap Fill to smooth out those patches.


‣
‣
‣

‣

‣
‣
‣
Slice your file
- Now that we’ve told the software how to lay out the model, it’s time to help it figure out more specifics about the printing process.
- The slicing software will then translate the model into “G-code,” which is a file format that the 3D printer knows how to use.
- Unlike 3D Printer OS, you set up slicing settings in the same page as layout settings. They can be found on the lower left side of the page.
- If you are looking to print quickly, you don’t need to worry about changing any settings and can skip the next step. If you want to dial in your print settings, you can hover over the setting titles for a brief description.
- If you change a setting and then change your mind, select the orange circle arrow next to that setting to change it back to the default.
- Once you’re ready to print, select “Slice plate” in the top right corner.


‣

‣
- 3d printers work by stacking layers of filament. If there is an overhang (sharp unsupported angle) then it needs something to be layered on top of when printing. This is called “support” material.
- Support material is removed after printing.


- Our preference is to use tree-shaped supports because they are the easiest to remove and use less filament than traditional supports.
- If you need support, go back to the slicing settings. Under “Support,” check the box next to “Enable support.”
- This will allow the software to add support material where needed during the process of slicing.
- Again, you are welcome to experiment with the settings here but in most cases it will print well with the default settings.
- After enabling support, select “Slice plate” again. This time when it slices the model it will add more material to support it.
- Don’t worry if it looks weird — you’ll be removing it after it prints!


‣
Print your model
- In the top right, select “Print plate.”
- Once the following dialog pops up, select “Send.”
- Don’t forget to pick up your print when it’s finished!
- If it hasn’t been removed already, allow it to cool and then pick your print up off the plate.
- If the print is stuck to the plate, remove the plate and gently flex it until the model pops off.

