Project
Date Created
Author
Tools & Skills
dtgfabric
[CoF] Careers of the Future
Launch Lab Connection
Competency
Status
Complete
- Preparing to DTG
- Set Up
- Printing Preparation
- Printing:
- Post Printing:
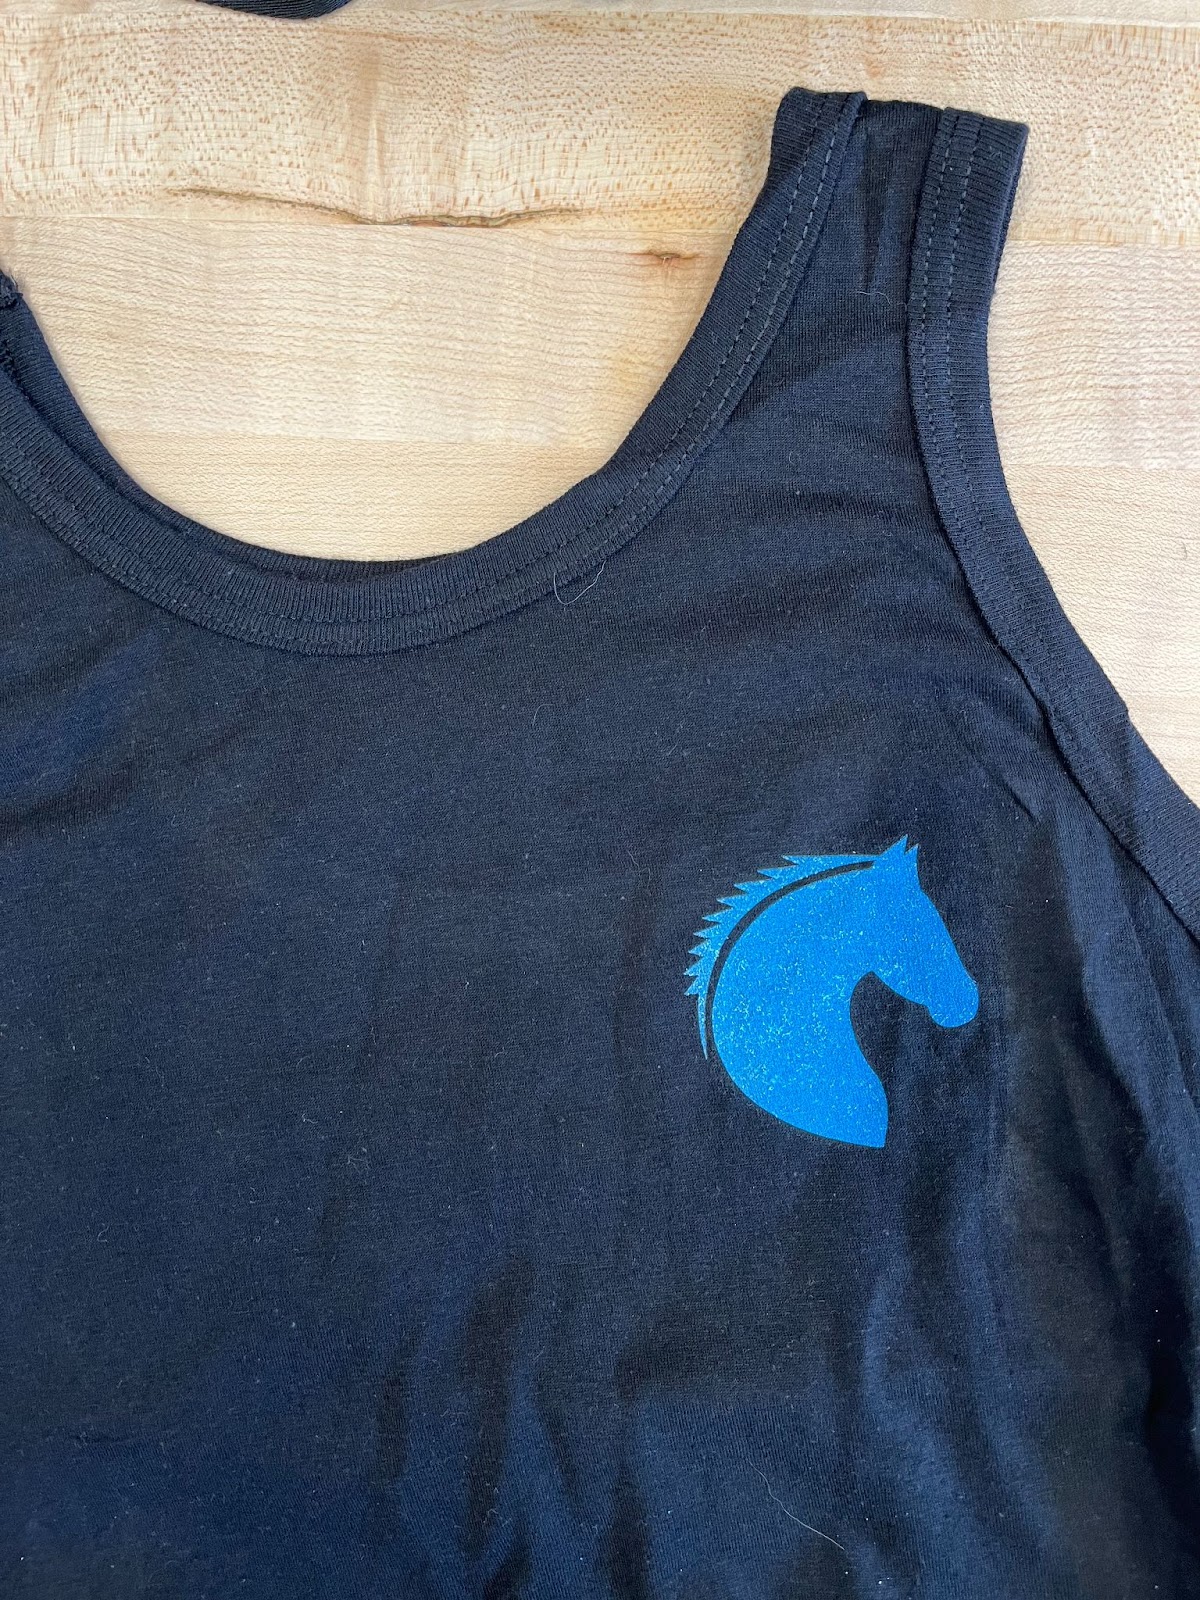
- Congratulations, you just created something amazing!!
Preparing to DTG
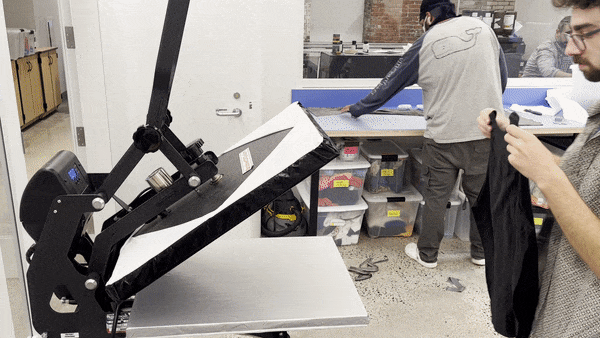
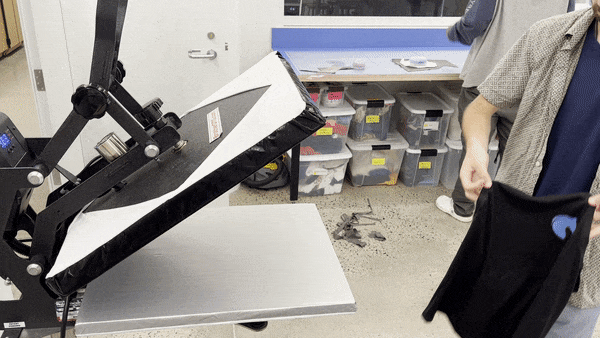
Step 1: Turn on heat press
- Pretreat if dark material
- Cottons and cotton blends are best, polyester is harder but can work.
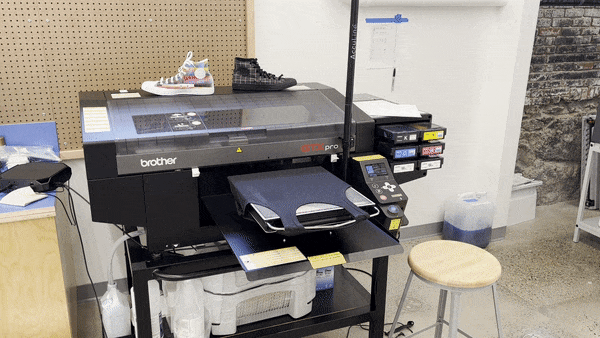
- Put garment into machine making sure the material is flat and it is centered.
- Take a photo of garment
- upload photo to acculine and position it correctly.
- Mask if needed
- Select correct settings
- Send over to DTG
- Try to print
- If DTG not happy, Change height of platten or smooth out wrinkles or change out platten.
- [Have examples of how different garments fit on the DTG]
- When done printing, Carefully lift garment from DTG and heat press it.
Set Up
- Make sure the heat press is turned on and get to around 350 degrees
- If you are printing on darker material, pretreat the garment using this tutorial
- Position the clothing/fabric so that the part you want to print is on the bed of the DTG printer making sure that it is flat and facing away from you. If your garment is made from cotton and cotton blends, it will work best. Polyester will be a little more complicated and might turn out worse but it is still printable.

- Save the image you want to print as a JPEG or PNG on the computer next to the DTG printer. You can do some editing of the image just before you print, but it is easier and better to do any cropping/ editing of the image before you save it.
Printing Preparation
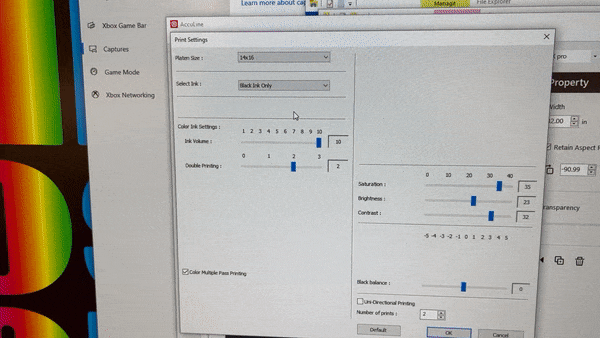
- Open up AccuLine on the DTG computer.
- Using the camera button near the top of the window, take a screenshot of the DTG bed.
- Using the third button on the left; upload your saved image into AccuLine. (JPG, PNG)
- Using the mouse tool, first button on the left, place your image on the part of the clothing/fabric you want to be printed. You can also scale the image by clicking and dragging on one of the corners of the image.

- OPTIONAL: If you want to not print the entire image, using the fourth button to the left, you can mask out any parts of the image you don’t want printed. Just draw over the parts of the image you don’t want printed and they won’t print. You can also change the brush size. You can also change the color of the masking, but this has no functional change, it is only so you can see it better.

- Using the gear on the top right, you can change the printing settings. On the top left of the settings, if you are printing onto LIGHT color material, select Color Only. If you are printing onto DARK material, select White + Color and make sure you have pretreated your material (see instructions at top of guide). You do not need to worry about any other settings than that.
- When you are ready to print, click the printer in the top right corner.

Printing:
- You will hear a ding almost immediately and when you do, you can press the green button on the actual printer.
- One of three things will now happen.
- The print works
- Congrats! You did it!
- The machine says there is an obstacle in the way and cancel the print
- If there is an obstacle, making sure the fabric is flat and then try lowering the bed by moving the lever underneath the bed to the right and –IF YOU DON’T KNOW HOW TO ADJUST THIS PLEASE GET A S-TEAM MEMBER!
- The machine says the print is too low and cancel the print
- If the print is too low, try raising the bed by moving the lever underneath the bed to the left, again, get a S-TEAM MEMBER TO HELP!


- If the print didn’t work, make the necessary adjustments also noting that if you adjusted the clothing/fabric, take another screenshot to make sure the image is still lined up.
- After everything is adjusted, click the GREEN BUTTON and it will print!
Post Printing:
- Immediately after printing, the paint is wet on the fabric, so before it gets heat pressed, make sure the wet paint touches nothing or else the print could be ruined.
- Carefully make your way to the heat press and making sure that the clothing/fabric is flat then heat press your clothing/fabric.
Congratulations, you just created something amazing!!